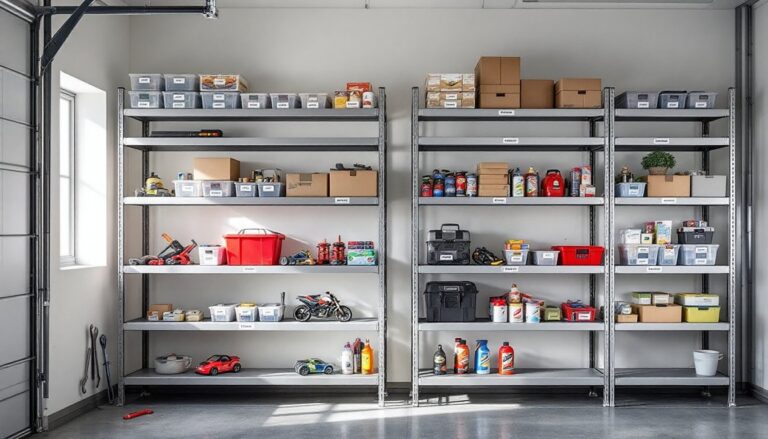
If you’re tired of squeezing into closets, tripping over bins, or wondering where everything goes, you’re not alone. Modern homes are getting smaller while possessions keep multiplying. High density storage solutions transform cramped spaces into organized, functional rooms by using vertical space, smart furniture, and modular systems. Whether you’re dealing with a tiny apartment, a full house, or just a cluttered bedroom, the right storage approach can reclaim square footage you didn’t know you had. This guide walks you through practical high density storage strategies that any homeowner can carry out, no contractor required.
Table of Contents
ToggleKey Takeaways
- High density storage solutions maximize floor space by using vertical systems, wall-mounted shelves, and modular furniture, allowing homeowners to reclaim 15–20% of their living space without major renovations.
- Vertical wall-mounted shelving anchored into studs can hold up to 50 pounds per shelf and serves as the backbone of effective high density storage while keeping floors clear for everyday movement.
- Multi-purpose furniture like storage benches, under-bed drawers, and wall-mounted desks hide capacity while maintaining a clean aesthetic, turning ordinary pieces into functional storage that blends seamlessly with your décor.
- Proper installation requires locating studs with a stud finder, using heavy-duty fasteners appropriate for your wall type, and checking levels in multiple directions to ensure safety and longevity.
- Organization is essential to high density storage success—use clear containers, label everything, group items by category, and perform quarterly maintenance to keep your system functional and accessible.
Why High Density Storage Matters for Modern Homes
Square footage costs money. Whether you’re renting or own, wasting space on clutter or inefficient storage is literally throwing money away. High density storage packs more items into less floor area, which means you don’t have to add a shed, rent a unit, or move to a bigger house.
The challenge isn’t about having too much stuff, it’s about not knowing where it is. A well-designed high density storage system lets you find things fast, access them safely, and keep them protected from dust and damage. Plus, when guests drop by, you can actually invite them inside without apologizing for the chaos.
In 2026, storage design has gotten smarter. Modular shelving adapts as your needs change, wall-mounted systems are genuinely attractive (not just industrial-looking cages), and furniture manufacturers finally understand that people need to store more than throw pillows. The investment pays for itself the moment you stop buying duplicates because you forgot you already owned something.
Vertical Storage Systems That Work
The golden rule: go up. Every inch of wall space is potential storage. Vertical systems are the backbone of high density storage because they leave your floor clear for living, moving, and, let’s be honest, walking without stubbing your toe on a plastic bin.
Wall-Mounted and Modular Options
Wall-mounted shelving is the fastest win. Before you install anything, locate your wall studs with a stud finder (around $15–30). Shelves anchored directly into studs hold serious weight, up to 50 pounds per shelf for 16-inch stud spacing. Open shelving works great for frequently used items, but dust is real: consider doors or boxes for seasonal gear.
Modular shelving systems like Elfa or Système Slotted Wall give you flexibility without permanent damage. They use a rail system anchored to studs, then brackets and shelves clip in at adjustable heights. This approach is rental-friendly and adapts when your storage needs shift. Costs run $100–400 per wall depending on size.
Pegboard and panel systems are budget alternatives ($30–80 per sheet). They don’t hold as much weight as shelving but work perfectly for tools, craft supplies, and light items. Pair them with bins to wrangle small parts.
When installing, measure twice. Use a level, a shelf that tilts 1 degree looks crooked and isn’t safe. If you’re mounting into drywall without studs, use toggle bolts or heavy-duty wall anchors rated for the weight you’re storing. Cheap anchors fail: expensive failures are loud and destructive.
Multi-Purpose Furniture and Hidden Storage
Not every square foot should scream “storage.” Smart furniture hides capacity while looking intentional. A bench with lift-up seat storage holds blankets. Beds with drawers underneath reclaim the void most frames waste. Wall-mounted desks with shelving eliminate the desk footprint entirely.
Ottoman and storage boxes ($50–200) serve as seating, a footrest, and a container in one. They work in living rooms, bedrooms, and entryways without looking out of place. Look for ones with internal dividers to keep contents organized.
Cabinets and credenzas store items behind doors so your room reads clean. Unlike open shelving, closed storage masks clutter. A dresser is high density storage pretending to be furniture. Vertical cabinets (taller, narrower footprints) use wall height instead of eating floor space.
When shopping, check interior dimensions, not just exterior size. A cabinet that looks huge might have thick walls and minimal usable depth. Open one in-store if possible. Also verify weight capacity, a shelving unit crammed with textbooks will sag if it’s not rated for the load.
According to practical storage advice, homeowners using creative multi-purpose furniture consistently report reclaiming 15–20% of their living space. That’s real square footage back in play.
Practical Installation Tips for DIY Enthusiasts
Install wrong once, and you’ll redo it three times. Here’s how to get it right the first time.
Step 1: Plan before you buy. Measure your wall (height and width), account for baseboards and trim, and decide what you’re storing. Shoes need less depth than jackets. Books are heavy: lightweight décor items aren’t. A 12-inch-deep shelf wastes space if you only need 8 inches.
Step 2: Locate studs. Use a magnetic stud finder ($10–20) for speed and reliability. Mark stud centers with painter’s tape. Studs in older homes might not be perfectly vertical: use a level to double-check.
Step 3: Use the right fasteners. Into studs: 3-inch wood screws. Into drywall: toggle bolts or heavy-duty anchors rated for your load. Don’t cheap out here. A $30 wall-mounted unit falling at 2 a.m. isn’t funny.
Step 4: Level everything. A 4-foot level is essential. Check both directions (side-to-side and front-to-back). Shelves that sag ruin the whole aesthetic and feel unsafe.
Step 5: Distribute weight evenly. Put heavier items toward the center of shelves, lighter items at edges. Overloading one side stresses the fasteners.
For hanging shelves, a drill with a 3/16-inch bit for pilot holes prevents wood splitting and fastener wandering. Safety: wear safety glasses, bits can grab and flick debris. If you’re drilling near electrical outlets or plumbing, use a stud finder that detects wiring: it costs a bit more but saves your Saturday to a hospital visit.
Consider hiring help if your walls are concrete, brick, or you’re mounting something over 8 feet high. A professional can assess wall integrity and use the right anchors. That’s not giving up: it’s being smart about risk.
Organizing and Maintaining Your High Density Storage
Building storage means nothing if you can’t find anything. Organization is the difference between a system that works and a hoard that looks tidy.
Use clear containers so you see contents without opening them. Label everything, yes, everything. A label maker ($20–40) pays for itself when you spend 10 fewer minutes hunting for the hole punch.
Group by category. Don’t scatter kitchen gadgets across three shelves. Keep them together. Same goes for seasonal decorations, tools, and paperwork. Proximity saves time and brain energy.
Rotate stock. First in, first out. Put new items behind older ones so nothing expires or gets forgotten in the back of a shelf. This especially matters for food, pantry items, and anything with a shelf life.
Check weight limits regularly. Shelves sag over time under sustained load. If something feels wobbly, redistribute weight or reinforce with additional fasteners. A shelf failing is a safety issue and a waste of what you stored.
Dust monthly if using open shelving. A damp microfiber cloth beats a feather duster. Closed cabinets need less attention but still collect dust along the tops.
Innovative storage hacks, like those featured in IKEA furniture customization for small spaces, often involve labeling systems and strategic container choices that keep high density storage accessible and organized. Many DIYers find that spending 30 minutes once a quarter reorganizing and checking labels saves hours of frustration during regular use.
Conclusion
High density storage isn’t about cramming everything into sight. It’s about using your space smartly so you live comfortably in your home instead of around your stuff. Start with one wall or room, measure carefully, anchor securely, and organize logically. Small moves, a wall-mounted shelf here, a multi-purpose bench there, compound into real, usable space. Your future self will thank you when you can actually park in the garage instead of stepping over bins. Begin this weekend, and by next month, you’ll be wondering why you waited so long.