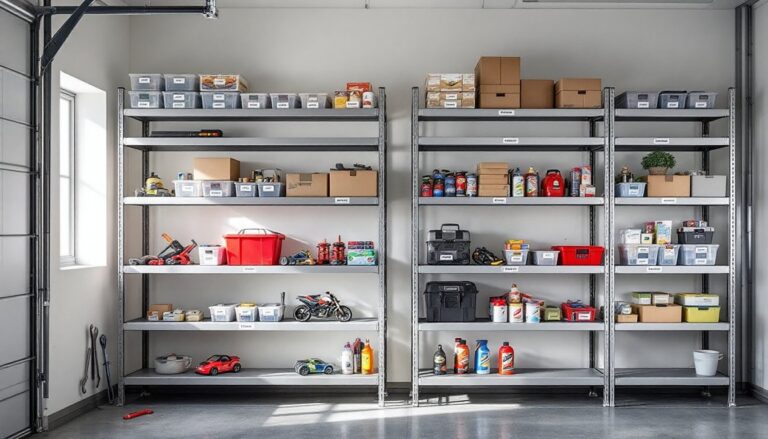
Garages are notorious for clutter. Between seasonal decorations, tools, sports equipment, and half-finished projects, most homeowners struggle to find floor space, let alone a place to park. Metal garage storage shelves offer a straightforward, durable solution that doesn’t require major construction or a contractor’s budget. They handle weight, resist moisture better than wood, and assemble in an afternoon. Whether you’re dealing with a cramped single-car garage or a sprawling two-bay setup, the right metal shelving system transforms wasted vertical space into organized, accessible storage, freeing up your floor and your sanity.
Table of Contents
ToggleKey Takeaways
- Metal garage storage shelves outperform wood and plastic alternatives by resisting moisture, insects, and temperature swings while supporting 200–600 pounds per shelf at 20–40% lower cost than custom wood solutions.
- Freestanding bolt-together metal shelves require only a wrench and an hour or two to assemble, making them ideal for renters, while wall-mounted bracket systems demand precise stud location but provide rock-solid permanent support.
- Proper installation requires leveling your floor, anchoring brackets directly into wall studs spaced 16 inches on center, and using lag bolts at least 2.5 inches deep to ensure safety and stability.
- Organize shelves by grouping like items, reserving lower shelves for heavy power tools and automotive fluids while keeping frequently accessed lighter items at arm height.
- Extend metal shelf lifespan with simple maintenance: clean quarterly with a dry cloth, check and tighten fasteners every six months, address rust spots early with wire brush and rust-inhibiting spray, and upgrade to heavier-gauge steel frames (16–18 gauge) for durability.
- Transform wasted vertical garage space into organized, accessible storage that frees up floor area and improves safety without requiring permits, carpentry skills, or professional installation.
Why Metal Shelving Is the Best Choice for Garage Storage
Metal shelving outperforms wood and plastic alternatives in garages for a simple reason: durability meets practicality. Steel and aluminum resist moisture, insects, and temperature swings that would warp or rot wooden shelves within a few years. A typical metal shelf system can handle 200 to 600 pounds per shelf, depending on the frame material and support spacing, while wood shelves of the same depth often sag under half that load.
Another advantage is longevity. Metal doesn’t rot, won’t absorb moisture during humid summers, and doesn’t become brittle in cold. Paint or powder-coat finishes protect against rust, and even basic epoxy-coated steel holds up longer than stained plywood. Plus, metal shelving typically costs 20-40% less than custom wood solutions and requires no special tools or carpentry skills to install.
Garage environments are harsh. Seasonal temperature swings, humidity, exhaust fumes, and the occasional spill create conditions wood can’t handle long-term. Metal shelves forgive this abuse. If a shelf does get dented or marked, it doesn’t compromise function, only appearance.
Types of Metal Garage Storage Shelves: Finding What Works for Your Space
Not all metal shelves are created equal. Your choice depends on load requirements, available wall space, and how much assembly patience you have.
Freestanding bolt-together units are the workhorses of garage storage. They typically come with four vertical posts connected by horizontal frame members, with shelves that rest or bolt on top. These units are 48 to 96 inches wide, 18 to 24 inches deep, and 60 to 84 inches tall, enough to cover most wall spaces without looking industrial. Load capacity ranges from 300 to 600 pounds per shelf. Assembly takes an hour or two with a wrench and doesn’t require fastening to walls, making them perfect for renters or anyone hesitant about drilling into drywall.
Wall-mounted bracket systems maximize vertical space and are ideal for narrow walls or to keep floor area clear. You bolt steel brackets directly to wall studs, then set shelves on top. These systems are more permanent but offer rock-solid support if installed correctly. They demand accurate stud location and drilling, so patience and a stud finder are essential.
Rivet-together shelving is lighter-duty but compact and affordable. The shelves are riveted to the frame and don’t adjust. They’re fine for tools or light-to-medium items but not ideal for heavier equipment.
Wall material matters. Drywall alone won’t hold shelves safely. You must anchor brackets or posts directly into wall studs, which are spaced 16 inches on center in most homes. If no studs align with your desired shelf location, you’ll need toggle bolts or heavy-duty anchors, less reliable than studs.
How to Install Metal Garage Shelves: A Step-by-Step Guide
Installation difficulty depends on your shelf type. Freestanding units are the easiest: wall-mounted systems demand more precision.
For freestanding bolt-together shelves:
- Clear and level the installation area. Uneven floors cause rocking and unstable stacks.
- Lay out all parts and hardware before assembly. Missing bolts derail the whole job.
- Assemble the frame according to the manual, typically bolting vertical posts to horizontal frame members.
- Set shelves on the frame supports and bolt or slot them in place per manufacturer instructions.
- Check that the entire unit is square and level. Adjust by shimming under posts if needed.
- Load gradually. Don’t stack everything on the first day: let shelves settle.
Wear work gloves to protect your hands from sharp metal edges, and use the correct wrench or socket size to avoid stripping bolts.
For wall-mounted bracket systems:
- Locate and mark wall studs using a stud finder. Mark the center of each stud with a pencil.
- Measure and mark bracket locations. Brackets spaced 24 to 32 inches apart provide solid support for most loads.
- Drill pilot holes at bracket mounting points. Use a 7/64-inch or 1/8-inch drill bit for typical stud bolts.
- Mount brackets using lag bolts or hex screws at least 2.5 inches into the stud. Brackets must be level: use a level bar to confirm.
- Set shelves on brackets and secure per instructions.
- Don’t over-tighten bolts, metal can strip or warp under excessive force.
Popular Mechanics has detailed guides on fastener selection and wall mounting if you’re unsure about hardware. Wear safety glasses during drilling and assembly to shield against metal dust and flying debris.
Organizing and Maximizing Your Shelves
Installing shelves is half the battle: organizing them separates functional storage from a junkyard.
Group like items together. Batteries, extension cords, and small hand tools belong in one zone: seasonal decorations in another: larger power tools and equipment in a third. This habit saves time and prevents duplicate purchases.
Use vertical space efficiently. Don’t assume each shelf must hold the same items. Reserve lower shelves for heavy items like power tools, automotive fluids, or paint cans. Place lighter, frequently accessed items at arm height. Keep rarely used equipment on upper shelves.
Invest in bin organization. Clear plastic bins or metal tool boxes stack neatly and protect contents from dust and moisture. Label them clearly. A $5 label maker pays for itself in time saved hunting for fasteners.
Store hazardous materials safely. Paint thinners, automotive chemicals, and other flammable items require well-ventilated shelves away from ignition sources and out of children’s reach. Absorbent mats or trays catch spills before they reach your floor or other items below.
Don’t overload shelves. Even though metal shelves handle serious weight, distributed loads stay safer and last longer. A shelf that’s flexing visibly under weight is working too hard and may fail prematurely.
Re-evaluate your system seasonally. Instructables has community-shared storage solutions that show creative approaches to garage organization you might adapt.
Maintenance and Durability Tips
Metal shelves are low-maintenance, but a little care extends their life dramatically.
Clean periodically. Dust, pollen, and debris settle on shelves and can hold moisture against the metal surface. A dry cloth or compressed air keeps shelves clean. In humid regions, wipe shelves quarterly to prevent rust spots.
Check fasteners. Vibration from nearby machinery or garage door operation can loosen bolts over time. Every six months, walk through with a wrench and snug any bolts that feel loose. Don’t over-tighten, just firm is fine.
Address rust early. If you spot surface rust (a reddish-brown spotting), scrub it with a wire brush or fine steel wool and touch up with rust-inhibiting spray paint. Catching rust early prevents deep pitting that weakens metal.
Avoid impact damage. Don’t use shelves as a workbench or strike them with tools. Dents don’t fail the shelf structurally but can collect moisture in the creases. Small dents are cosmetic: large deformations signal overload or impact damage.
Upgrade finishes if needed. If the original coating wears through in high-traffic areas, a light sanding and spray of epoxy or polyurethane-based metal paint renews the protective layer. This is a 30-minute job with basic tools and extends the shelf life significantly.
Quality matters. A heavier gauge steel (typically 16 or 18 gauge for frame and shelves) costs 15-20% more upfront but resists denting and flexing far better than thinner material. It’s worth the premium if you’re building a system to last a decade or more.
Conclusion
Metal garage storage shelves solve the clutter crisis without requiring permits, carpentry skills, or professional installation. They’re strong, long-lasting, and affordable, attributes that make them the sensible choice for nearly every garage. Whether you assemble a freestanding unit over a weekend or mount brackets to studs for a permanent solution, the return on investment shows immediately: a cleaner garage, safer work environment, and easier access to your belongings. Start with one section of wall and expand as your confidence (and needs) grow.