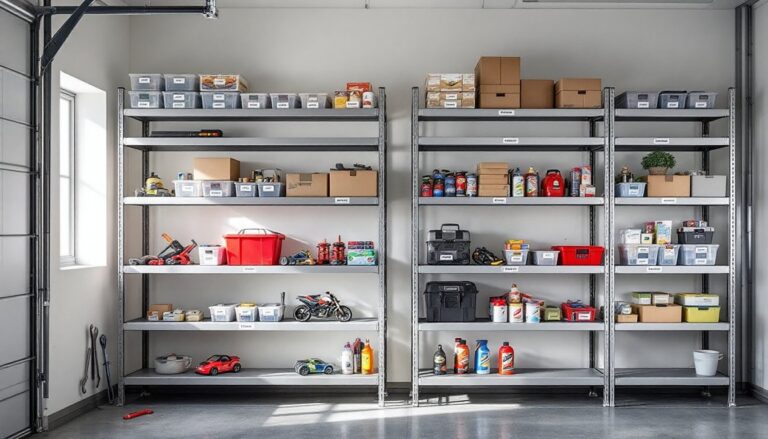
A cluttered shed wastes valuable real estate. Whether you’re storing seasonal gear, power tools, or garden supplies, poor organization eats up floor space and makes finding what you need a frustrating treasure hunt. The good news: maximizing shed storage doesn’t require a renovation or a second building. Smart storage solutions, from overhead racks to wall-mounted pegboards, can double your usable capacity while keeping everything accessible. This guide walks you through practical strategies to transform your shed into an organized, efficient workspace.
Table of Contents
ToggleKey Takeaways
- Assess your shed layout and inventory before purchasing storage solutions—accurate measurements and understanding wall structure (studs, siding type) ensure proper installation and optimal use of space.
- Vertical shelving and wall-mounted pegboards are cost-effective shed storage solutions that double usable capacity without consuming floor space, making them ideal for smaller sheds.
- Always mount heavy shelves and pegboards directly into wall studs using proper fasteners rated for your load—mounting to drywall alone risks catastrophic failure and safety hazards.
- Overhead racks bolted to ceiling joists expand storage for lightweight seasonal items, but keep loads under 100 pounds per joist and leave clearance around ventilation to prevent moisture buildup and rot.
- Label all bins and storage containers clearly on the front and spine, and maintain an inventory sheet for tools and hardware—this system eliminates the frustration of searching for items you already own.
Assess Your Current Shed Layout
Before buying a single shelf, spend time understanding what you’re working with. Measure your shed’s interior length, width, and height, including the distance from the floor to any roof trusses or rafters. Check wall condition, is the siding solid wood, metal, or vinyl? Are studs behind the walls (essential for mounting heavy shelves), and what’s the stud spacing (typically 16 or 24 inches on center)?
Next, audit what you’re actually storing. Pile items by category: hand tools, power tools, seasonal decorations, lawn equipment, automotive supplies. This inventory determines whether you need deep shelves for bulky items, narrow shelving for small parts, or overhead space for lightweight seasonal boxes. Be honest about frequency of use: items you grab weekly belong within arm’s reach, while off-season decorations can go high or toward the back.
Draw a quick floor plan on graph paper. Note door swing, windows, and any fixed features like a workbench. This prevents the common mistake of blocking access or mounting shelves where they collide with ladder placement or vehicle movement. Ten minutes of planning saves hours of remounting.
Vertical Shelving and Wall-Mounted Storage
Vertical space is your cheapest square footage. Wall-mounted shelving transforms wasted wall area into usable storage without consuming floor space, critical in smaller sheds where every square foot matters.
Choosing the Right Shelving System
You have three main options: heavy-duty industrial shelving (metal angle-iron units), wall-mounted wood shelving, or modular systems with adjustable brackets. Industrial shelving handles 500+ pounds per shelf, works on unfinished walls, and doesn’t require studs, just anchor bolts into a concrete floor. It’s the workhorse choice for sheds where looks don’t matter and weight capacity does.
Wall-mounted shelving requires studs and lag bolts or French cleats. Build shelves from 2×10 or 2×12 boards (these hold meaningful weight without excessive sag). Space supports every 16 inches for medium loads. Modular bracket systems offer flexibility, you adjust shelf height as needs change, but verify weight ratings and ensure brackets anchor into studs, not just drywall.
For painted wood sheds with stud walls, French cleats are ideal: a 45-degree wooden rail bolted to studs accepts a matching rail on the shelf back. This distributes load and hides fasteners. Install shelves 14–16 inches apart vertically: taller spacing wastes capacity, narrower spacing limits what fits.
Always account for actual stud locations with a stud finder. Mounting purely to drywall fails catastrophically. If studs don’t align with your desired shelf placement, add horizontal 2×4 blocking between studs or use heavy-duty toggle bolts rated for your load. Don’t guess, confirm with fastener manufacturer specs that your anchor matches your weight.
Pegboards and Tool Organization
Pegboards are organizational gold for hand tools, measuring equipment, and small power tools. A 4×8 sheet of 1/4-inch hardboard pegboard with matching hooks and shelves lets you customize layout and shift items as your collection grows.
Install pegboard with 1-inch spacers behind it (cut from scrap 1×1 lumber or use commercial pegboard spacers) so hooks thread freely. Mount it to studs with bolts every 16 inches or use construction adhesive plus fasteners into solid backing. A pegboard feels professional but demands accurate installation: gaps cause hooks to bind.
Organize tools logically: frequently used items at eye level, heavier tools lower, decorative or rarely used items higher. Label pegboard zones with masking tape and permanent marker so others (and you, months later) know where things belong. Add a small cabinet or drawer unit below pegboard for nuts, bolts, and consumables, items that clutter hooks but need close access.
Consider pegboard alternatives like step-by-step DIY tutorials that show slatwall (grooved panels accepting any shelf or hook height) or French cleat systems using smaller boards. Slatwall requires more wall prep but looks neater and flexes easier if you rearrange.
Overhead Storage and Ceiling Solutions
Overhead space is often overlooked but invaluable. Joists (the horizontal beams forming your ceiling structure, typically 2×6 or 2×8 lumber spaced 16–24 inches apart) can support racks for lightweight seasonal items: holiday decorations, camping gear, extra paint cans, or off-season clothing.
Heavy-duty suspended racks bolt directly to joists or use a cable system rated for your load. For concrete ceilings (common in prefab sheds), anchor bolts into concrete every 16 inches, don’t skimp on fastener quality. A falling storage rack is a safety hazard.
Keep overhead items lightweight. A storage rack holding 100 pounds distributed across two joists is safe: 400 pounds risks joist failure over time, especially if the shed experiences temperature swings or settling. Label bins clearly so you know contents without climbing a ladder.
Alternatively, chains and eyebolts threaded through rafters support rope-and-board platforms for extremely lightweight storage. This approach is cheap and adjustable but demands careful load calculation. If uncertain, consult the shed’s original plans or hire a structural assessor, a few dollars now prevents injury or property damage.
Avoid blocking ventilation. Overhead storage can trap heat and moisture, promoting rot and mold, especially in sealed sheds. Use wire shelving (better airflow than solid shelves) and leave 12–18 inches of clearance below roof vents.
Labeled Bins and Containment Systems
Shelves and pegboards fail without containment. Clear plastic bins (12–50-gallon capacity) let you see contents without opening them, critical for seasonal items and small-parts storage. Stack similar bins together: decorations in one corner, automotive supplies in another, garden seed and tools grouped.
Label bins on the front and spine with a permanent marker or label maker. “Holiday Lights” beats an unmarked gray bin you’ll wonder about in July. Add date labels on seasonal boxes so you know what’s old and ripe for decluttering.
For tools and hardware, drawer cabinets (metal or plastic) keep moisture away and organize fasteners by size and type. Wall-mounted pegboard organizers with small baskets work for screws, bolts, and washers. Include an inventory sheet inside cabinets listing contents: this saves the “I know I have a 1/2-inch wrench… somewhere” frustration.
Roll-out bins on wheels (locking casters essential for safety) let you slide items under workbenches or into deep shelves without climbing. Choose bins with sturdy bases: cheap plastic bins tip easily if pulled unevenly. For moisture-prone sheds, beginner woodworking projects often include instructions for building simple wooden crates with better ventilation than sealed bins.
Conclusion
Shed storage transformation isn’t complicated, it’s about vertical thinking, honest assessment, and deliberate placement. Start with wall-mounted shelving or pegboards, add overhead capacity, and seal everything into labeled bins. The result: you’ll find your tools, protect items from weather and pests, and reclaim floor space for actual work. Your shed becomes efficient, not just a dump. Pick one solution and start this weekend.